

Answer
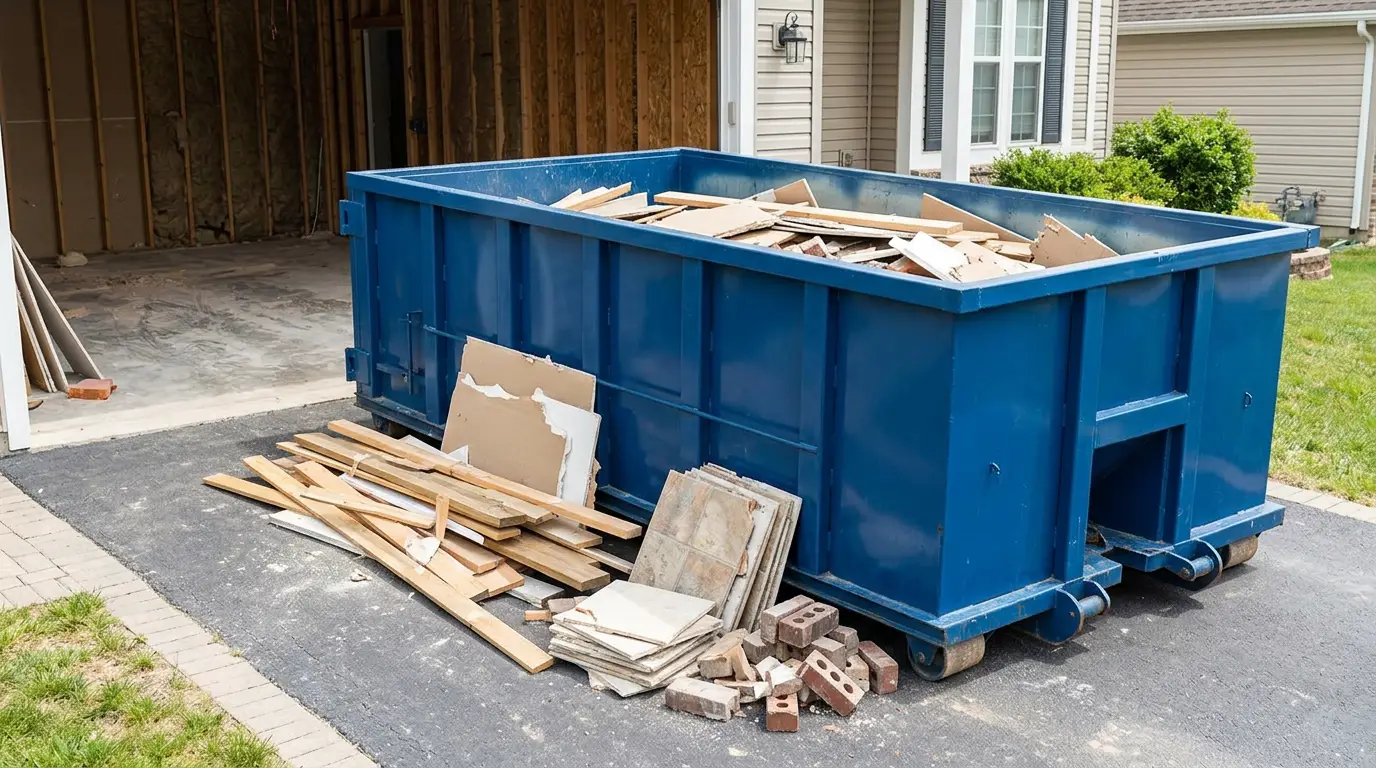
Effective bin rental tips for home renovations focus on smart waste management from the start, covering aspects like choosing the correct bin size and understanding proper loading techniques. You Junk It… I Dump It finds that proper preparation before delivery and pickup saves clients time and avoids potential fees. Following these guidelines helps manage renovation debris efficiently.
Overview
Planning for a renovation generates many questions about waste disposal. This article outlines strategies for managing debris effectively, from selecting the correct bin to understanding rental terms. It also includes a labeled real-world hypothetical about Brenda’s renovation project, pointing to site-level recommendations.
- Bin Size: Begin by selecting the right bin size to match your project’s waste volume.
- Item Safety: Learn how to dispose of items safely according to local regulations.
- Real-World Example: Avoid common errors with practical dumpster rental advice.
- Bin Placement: Prepare your site for optimal bin placement and delivery truck access.
- Rental Period: Consider the optimal rental duration for your renovation timeline.
- Service Quote: Gather all details before you receive a quote for bin rental.
Choose the Right Bin Size
Selecting the correct bin size prevents overfilling and additional charges. Assessing the volume of debris your renovation generates is the primary step in picking an appropriate bin. We often recommend a slightly larger bin than initially estimated to accommodate unexpected waste, as this typically costs less than renting a second bin or incurring overage fees.
Consider the density of your waste materials. Heavy items like concrete or soil compact differently than lighter materials such as wood or drywall. For example, a bathroom remodel usually produces less volume but heavier waste than a full kitchen demolition. You Junk It… I Dump It provides a range of bin sizes to match various project scales and debris types. Bin Sizing can help determine specific needs.
| Project Type | Typical Bin Size (Cubic Yards) |
|---|---|
| Small Bathroom Remodel | 10-12 |
| Single Room Cleanup | 12-15 |
| Kitchen Demolition | 15-20 |
| Deck Removal (small) | 12-15 |
| Large Home Renovation | 20-30 |
| Roofing Shingles (single layer) | 10-15 |
| Landscaping Debris | 10-20 |
| Estate Cleanout | 15-30 |
Choosing an adequate bin is one of the most important bin rental tips for efficiency. This ensures all waste fits within the agreed-upon limits, avoiding potential delays or extra expenses. For more details on capacity and suitability, review our Our Clients page.
Dispose Of Items Safely
Sorting materials correctly for bin rentals prevents potential fines and ensures proper disposal. Different items require specific handling due to environmental regulations or safety concerns. Following local waste sorting guidelines helps streamline your project and avoid complications.
Before loading your bin, confirm what items are allowed. You Junk It… I Dump It emphasizes the importance of reviewing acceptable materials to prevent issues during pickup. This step helps manage waste effectively and keeps costs predictable.
| Prohibited Item Category | Reason for Restriction |
|---|---|
| Hazardous Waste | Paints, chemicals, solvents, and motor oils pose environmental risks and require specialized disposal facilities. |
| Electronics (E-Waste) | Computers, TVs, and other electronics contain toxic materials; they often have separate recycling programs due to their components. |
| Tires | Tires are difficult to compact and often have fees associated with their recycling. |
| Batteries | Car batteries and household batteries can leak corrosive chemicals or pose fire hazards. |
| Appliances with Refrigerants | Fridges, freezers, and AC units contain refrigerants that must be removed by certified technicians. |
| Asbestos | This material is a severe health hazard and needs specialized handling and disposal by certified professionals. |
| Medical Waste | Sharps, pharmaceuticals, and biohazardous materials require strict medical waste disposal protocols. |
| Propane Tanks | Pressurized containers pose explosion risks if not emptied and disposed of properly. |
Understanding these restrictions protects both the environment and your project budget. For more details on what materials are accepted and how to sort waste, refer to the what goes where guide. Knowing what cannot go into a standard bin rental streamlines your cleanup process and ensures compliance with regulations.
Avoid Costly Dumpster Mistakes
Avoiding unexpected fees often involves proper planning for bin rentals. Many projects generate more debris than anticipated, and improper loading or prohibited items can result in additional charges.
Brenda is embarking on a major kitchen remodel and needs to rent a disposal bin. She’s worried about accidentally overloading the bin or filling it with prohibited materials, leading to extra charges. She wants to ensure she understands the best practices for waste management throughout the project.
Recommendation: Choosing the Correct Bin Size and Understanding Loading Techniques
You Junk It… I Dump It recommends focusing on smart waste management from the start by carefully selecting the right bin size for your project. Understanding proper loading techniques is also key to avoiding potential fees and ensuring efficient debris management.
Plan Bin Placement and Access
Proper bin placement ensures efficient loading and removal, preventing obstacles or potential damage. For example, older neighborhoods often feature narrow driveways, some as tight as 8-10 feet wide, which require careful planning for dumpster truck access. Placing wood boards underneath the bin helps protect driveways from the weight of heavy containers.
Considering the accessibility of your property is a key aspect of bin rental tips. Delivery trucks need ample space to maneuver, especially when backing into position or navigating around existing structures. We recommend discussing potential obstructions, such as low-hanging wires or overhanging tree branches, with us beforehand to prevent delays or complications.
| Consideration | Impact on Placement |
|---|---|
| Driveway Width | Trucks require at least 10 feet of clearance; Edmonton bin sizes vary, impacting required space. |
| Ground Surface | Soft ground or slopes can affect stability; choose a flat, firm area. |
| Obstructions | Low power lines or tree branches may block delivery or pickup; clear these zones. |
| Permit Needs | If placing on public property, a permit may be necessary. |
| Loading Ease | Position the bin close to the work area for easy loading, especially for heavy items. |
| Access for Removal | Ensure the truck has a clear path for pickup, allowing for safe hook-up and departure. |
You Junk It… I Dump It observes that clear access points help streamline the entire rental process for everyone. This includes considering where debris will originate from and how it will be transported to the bin. For detailed guidance on specific bin requirements, consult resources like how to choose the right dumpster size.
Bin Rental Duration
Determining the correct length for a bin rental often balances the convenience of extended access with potential daily costs. Projects vary, so aligning the rental period with your project timeline helps manage expenses effectively. We suggest considering the scope of your project, whether it is a small clear-out or a larger renovation, to estimate the time needed for debris removal.
Many homeowners find that a standard 7-day rental period works well for typical residential projects, allowing ample time for loading without rushing. For bigger jobs or unexpected delays, opting for a slightly longer initial period can prevent additional charges for extensions. If you find yourself needing more time, You Junk It… I Dump It offers flexible extension options to accommodate changes in your schedule.
Choosing between a shorter, cheaper rental and a longer, more expensive one depends directly on your project’s pace. While a shorter rental might offer a lower initial price, unexpected delays could lead to higher overall costs due to extension fees. Consider how different rental periods might impact your budget and timeline, and refer to our bin rental vs comparison for more details on different options.
| Bin Size | Typical Projects | Recommended Duration |
|---|---|---|
| 12 Cubic Yard | Small garage cleanouts, minor landscaping, single room decluttering | 3-5 days |
| 20 Cubic Yard | Medium bathroom renovations, deck removal (small), basement cleanouts | 5-7 days |
| 30 Cubic Yard | Major home renovations, large construction debris, full house clear-outs | 7-10 days |
| 40 Cubic Yard | Commercial projects, demolition waste, multi-room remodels | 10-14 days |
Get Your Quote
Requesting a bin rental quote provides clear pricing and service details before starting a project. This initial step helps ensure the right bin is available for your specific waste disposal needs, preventing unexpected costs or delays.
You Junk It… I Dump It streamlines the process by offering transparent pricing based on bin size, rental duration, and the type of materials you plan to dispose of. We find that many customers benefit from a clear estimate, especially when planning for home renovations or major cleanouts. For additional help, consider top benefits of using a bin rental service.
| Project Type | Recommended Bin Size (Cubic Yards) | Reasoning |
|---|---|---|
| Small Renovation (e.g., bathroom demo) | 10-15 | Sufficient for smaller debris volumes like tile, drywall, and fixtures. |
| Medium Renovation (e.g., kitchen demo) | 20 | Accommodates larger items and more substantial material removal, such as cabinetry and flooring. |
| Large Renovation (e.g., whole-home cleanout) | 30 | Suitable for significant demolition waste and bulkier items from extensive projects. |
| Yard Waste Cleanup | 10-15 | Ideal for disposing of organic materials like branches, leaves, and brush. |
| Estate Cleanout | 20-30 | Handles furniture, appliances, and general household clutter efficiently. |
If you have specific requirements or questions about Junk Bin Rentals, You Junk It… I Dump It can provide a customized quote tailored to your project. This helps ensure you receive the most cost-effective solution for your waste management plan.
FAQ
To help you navigate the process of renting a bin, we’ve compiled answers to some common questions, offering practical bin rental tips for your next project.
| Question | Answer |
|---|---|
| How do I determine the correct bin size for my renovation project? | Assess the total volume of debris your renovation will generate. It is often advisable to select a bin size slightly larger than your initial estimate. This can prevent the cost of renting a second bin or paying overage fees for an overloaded bin. Consider the density of materials; heavy items like concrete require different considerations than lighter debris. |
| What types of items are typically prohibited from bin rentals? | Hazardous waste, electronics, tires, batteries, appliances with refrigerants, asbestos, medical waste, and propane tanks are commonly restricted. These items require specialized disposal methods due to environmental regulations or safety concerns. Always confirm the list of prohibited items with your provider before loading the bin. |
| When should I plan for bin placement and access? | Plan bin placement considering driveway width, ground surface, and potential obstructions like low-hanging wires or trees. Ensure the delivery truck has at least 10 feet of clearance and a clear path for both delivery and pickup. Placing the bin on a flat, firm area close to your work zone aids efficient loading. |
| How long should I rent a bin for my project? | Align the rental period with your project timeline, balancing convenience with potential costs. A standard 7-day rental often suffices for typical residential projects. For larger jobs or if delays are possible, consider a slightly longer initial rental to avoid extension fees. |